Below are directions for installing the SANS (Subject Alternative Name) certificate using the CLI:
- The first step is accessing your unit via the CLI interface.
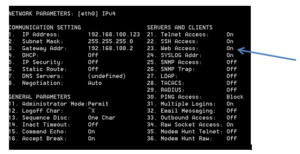
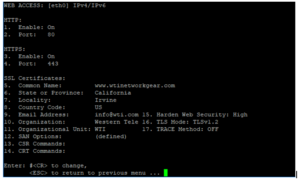
- Issue the unit a /N and select option Web Access
* Option 5 (common name) must already exist in DNS server
Select Option 12. SAN Options
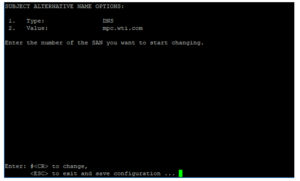
“SUBJECT ALTERNATIVE NAME” screen

On this screen you can select a slot to enter Alternative names or IP addresses that you wish to have in the certificate we will make. On the above screen if I want to edit Slot 1, I will get the following screen.
Select SAN type (IP address or DNS name) and Value
Hit <esc> twice to get to the main WEB ACCESS Screen
- Select option CSR Command and then select 1. Generate CSR.
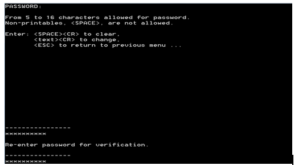
- It will prompt you to create a password, define password and hit enter
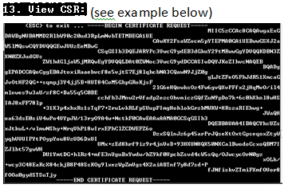
- Next select the option to Display CSR key
- It will prompt you to configure your terminal application to receive the file.
- Make sure the file is captured as a binary file
- For example in Tera term you check the binary box
- Note that it takes approximately 2 ½ minutes to create cert
- Submit the CERTIFICATE to a website that will create a signed certificate for you.
- Note that Verisign may take a couple of days to process your request.
- After having received the certificate select the option CRT Commands
- Select Upload Signed CRT Certificate (navigate to where you have the signed Certificate)
- Upload the server key in binary format
- When using Tera Term, go to file=>send file (check binary), select open
* Note that because the file is small there will be no indicator that it has finished transferring. Import should be almost instantaneous. ESC to exit the upload menu.
- Next verify that the server key took by selecting Display Signed CRT Certificate and selecting enter to make sure it took.
- Next you will need to toggle the web servers off and on.
ESC to save changes
- Issue a “/n” and select the option for web. Now set both HTTP & HTTPS to on.
- Next verify that the certificate took by opening up an HTTPS web session to the device.
- Directions may differ here due to browser and updates. The example below is for Chrome using the following build: Version 65.0.3325.181 (Official Build) (64-bit). At the top left of the URL select the Icon and click on the link below certificate.
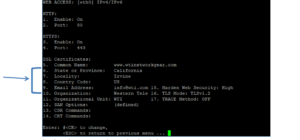
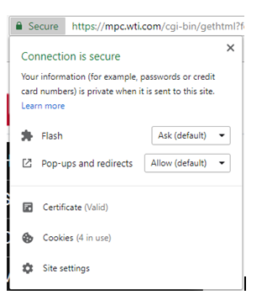 Verify that the “Issued by” is correct for the certificate.
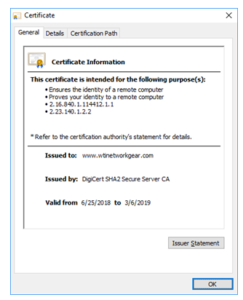
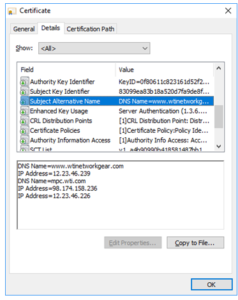
To check the SANS, Click on Details tab and choose “Subject Alternative Name”, your other names will be listed.